Welcome
In this guide, I'll show you how to download an Arduino project and upload it to an ESP32.
We'll use the DCC Servo Decoder project as an example, but the procedure is exactly the same for all the other ESP32 projects.
Download Arduino project
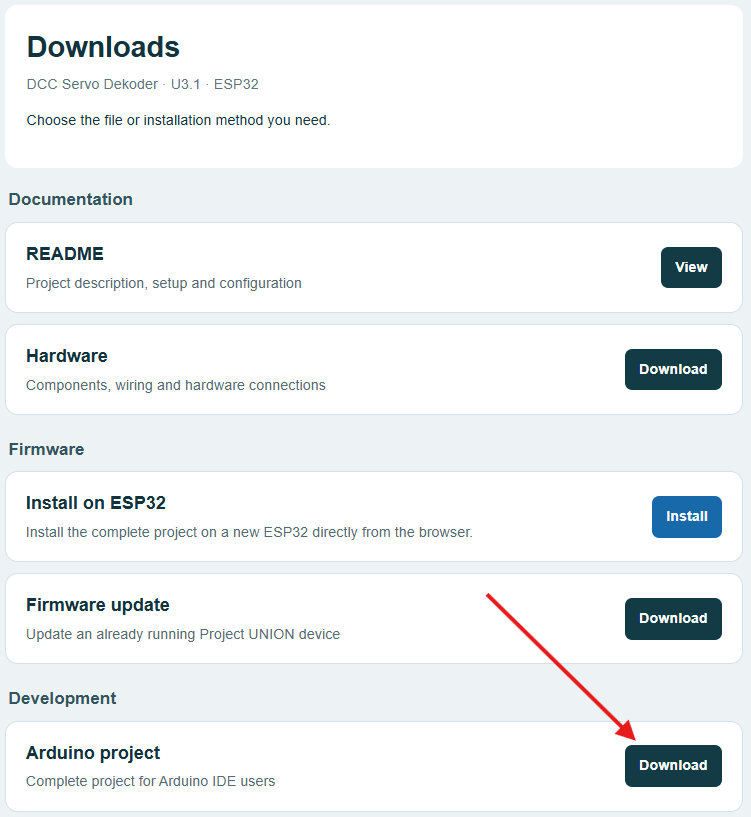
Find your project and click the "Download Arduino Project" button.
Download libraries ?
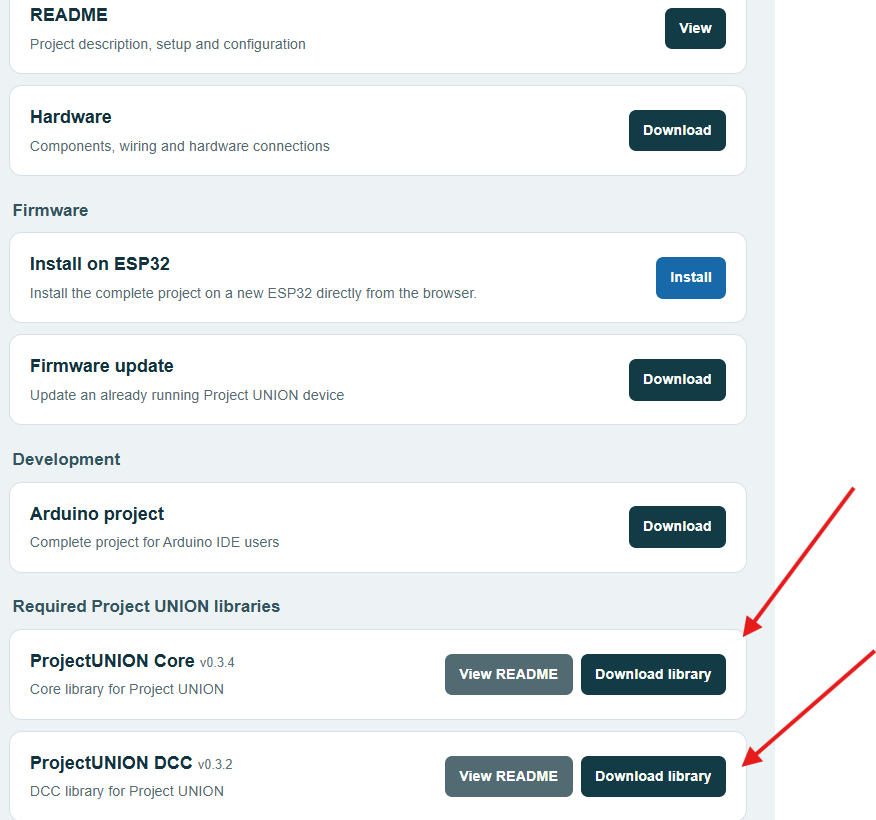
My ESP32 projects are built on a set of Arduino libraries. If you haven't already installed these libraries, please do so now. Depending on the project, you'll need between one and three libraries.
Open Arduino IDE with your project
Extract the downloaded Arduino project and open it in the Arduino IDE.
Then select the board type: ESP32 Dev Module.
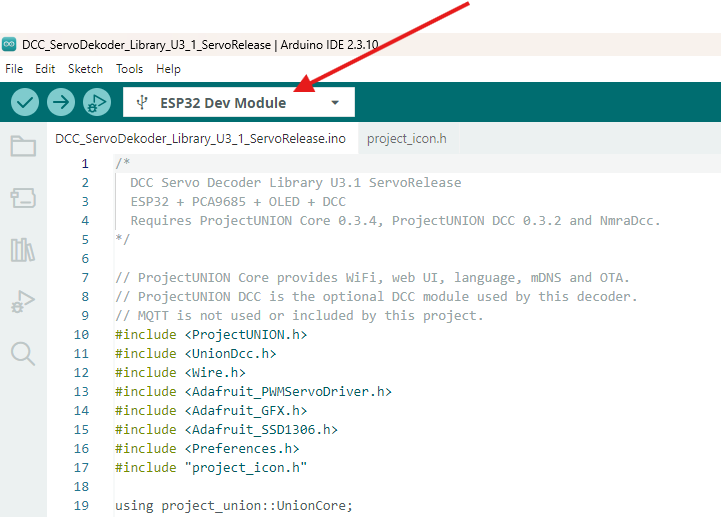
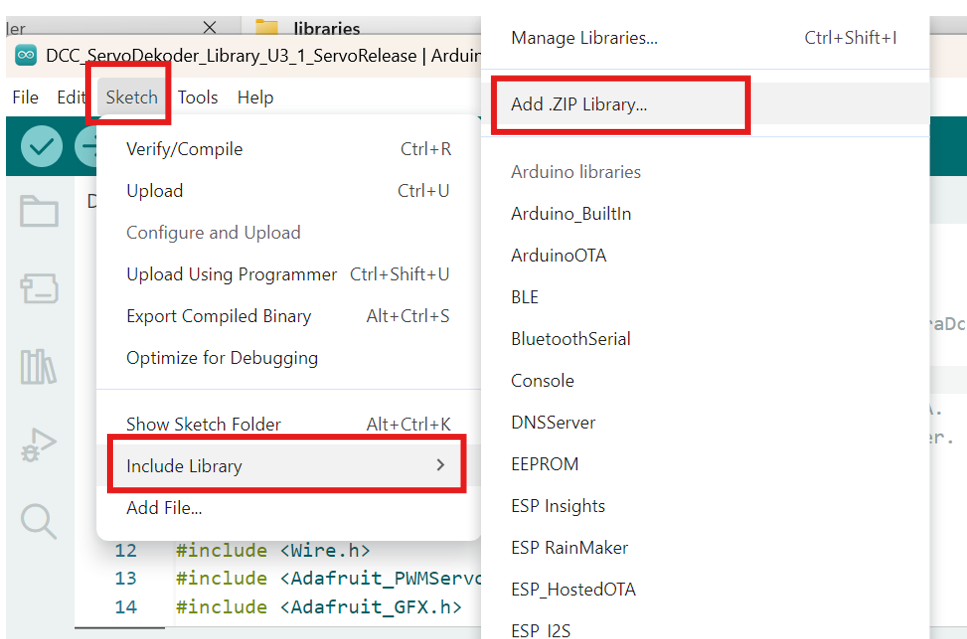
Do you want to install the downloaded libraries?
From Arduino IDE - Sketch -> Include Library -> Add .ZIP Library
Select the downloaded Library .ZIP file.
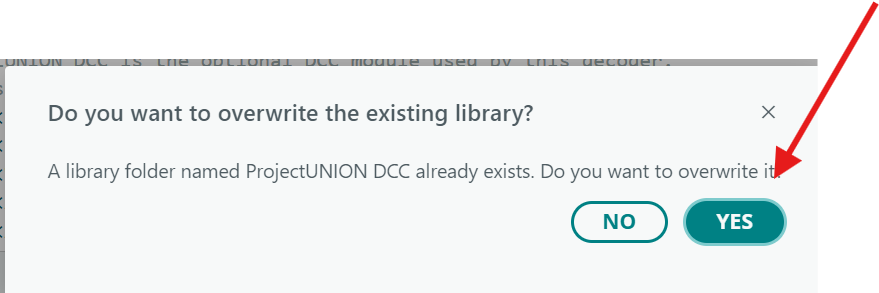
Library already exists - overwrite ?
If the library is already installed, Arduino IDE will ask if you want to replace it.
Simply click "Yes" to install the new version.
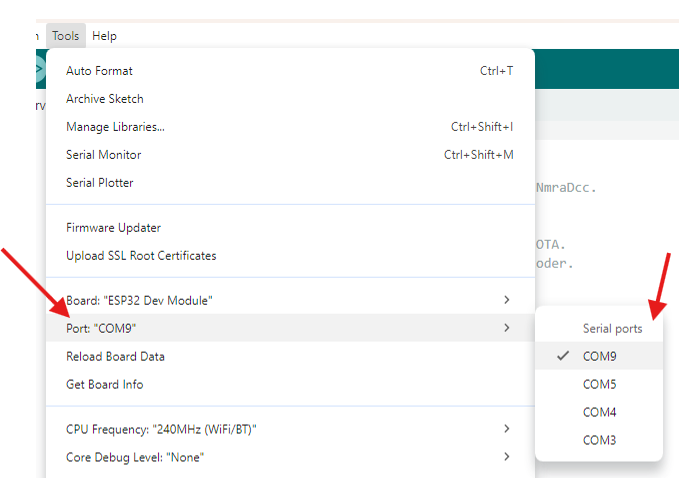
Select correct port
Connect your ESP32 to your PC using a USB cable.
Select the correct COM port. In this example, the ESP32 is connected to COM9, but the port number will vary depending on your computer and setup.
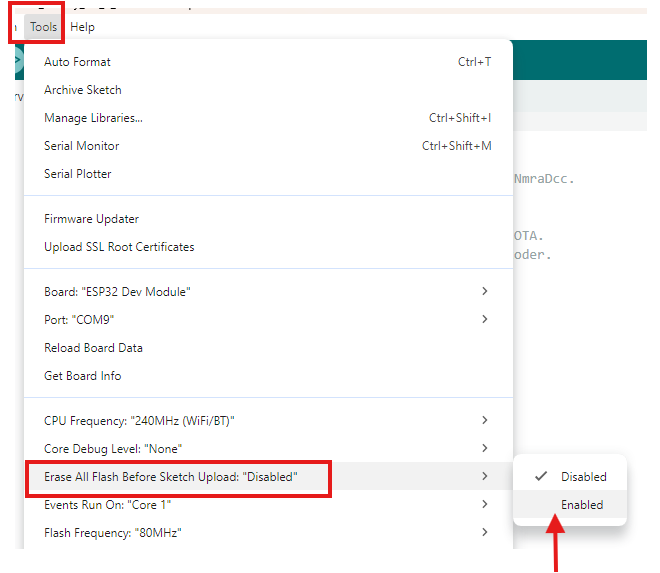
Erase Flash ?
If your ESP32 is not brand new, you may want to erase the flash memory before uploading a new project.
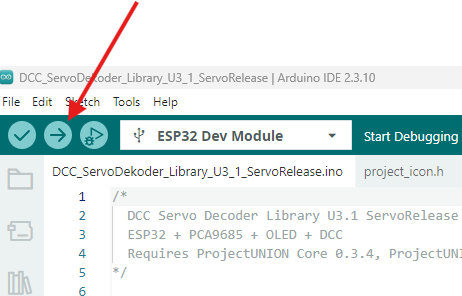
Upload code
Start uploading code ....
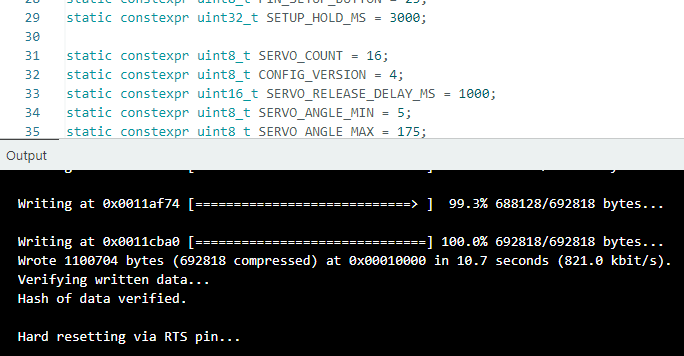
Upload OK - successful
If you see this message, the upload was successful.
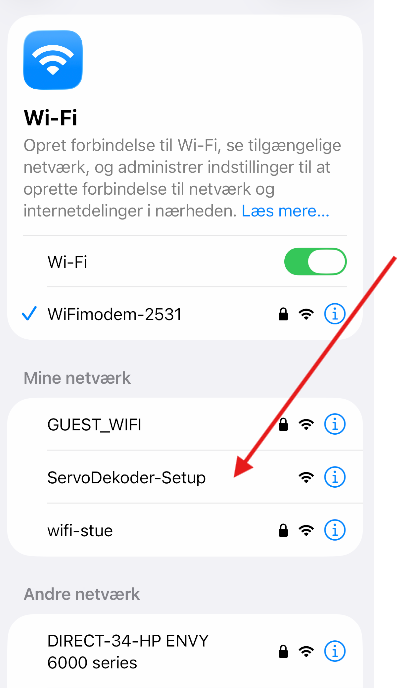
Check mobile Phone - for hotspot
Check the Wi-Fi settings on your mobile phone for a new hotspot. When it appears, tap it to connect.
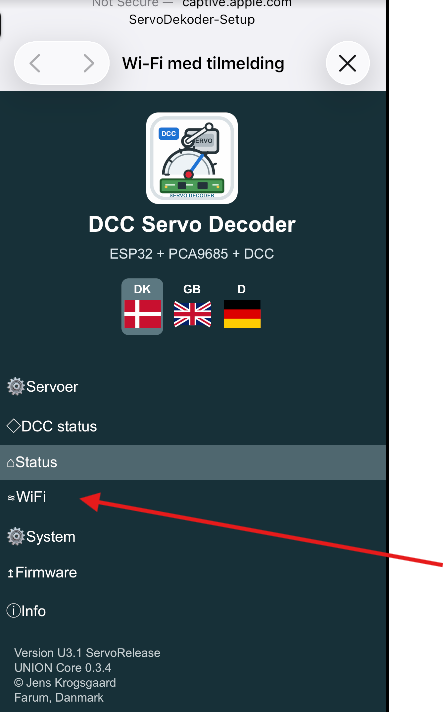
Web-config - chhose WiFi
The Web Configuration page is now displayed. Click on WiFi to continue.
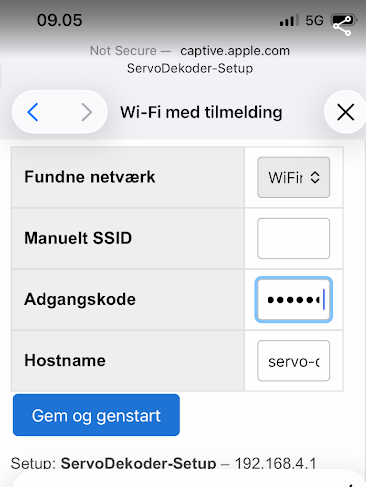
Type in WiFi credentials
Enter your Wi-Fi credentials, then click 'Gem og genstart' = 'Save and Restart'.
The ESP32 will restart and connect to your Wi-Fi network.
Connect to Web-config
Open a browser and type
http://servo-dekoder.local/ into the address bar.
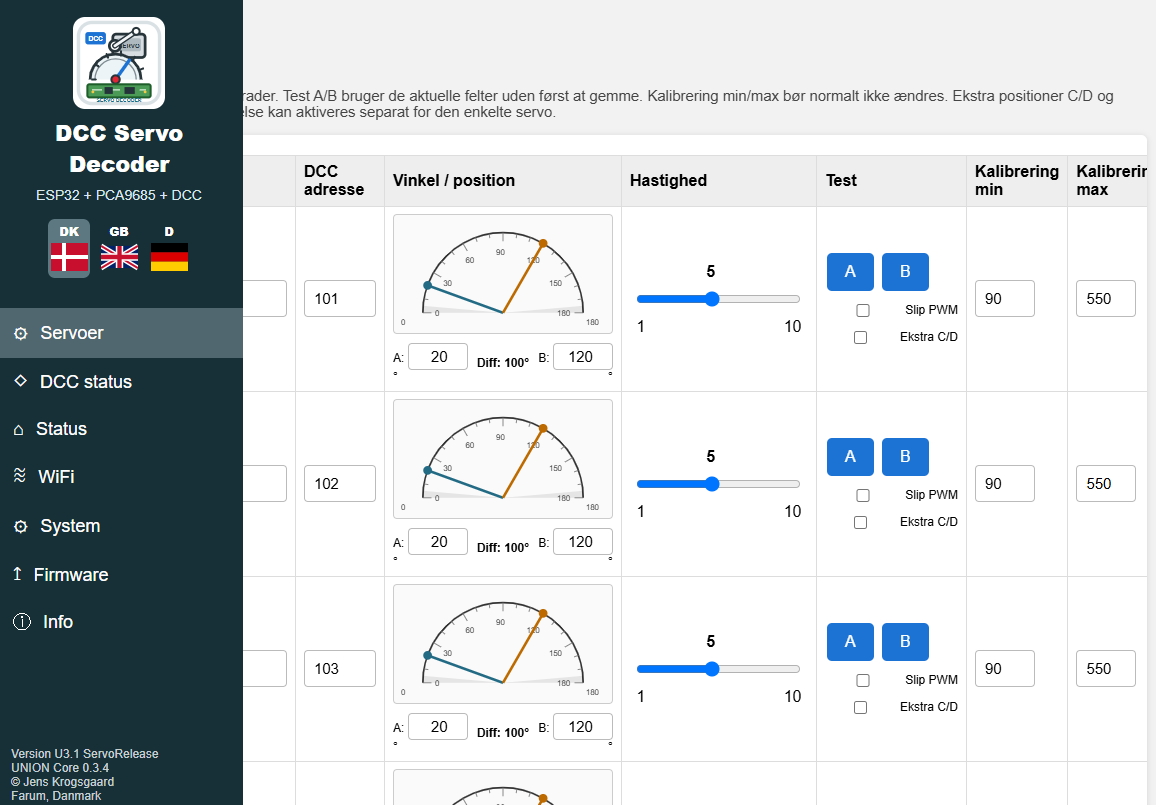
Your ESP32 should now connect to the browser, and you can proceed to configure it.